I wanted to explore using the Raspberry Pi for a camera system around the house. I couldn’t have been more pleased with how easy to use and setup it was.
This is the link to the blog I used to get my Security Cam setup working
https://randomnerdtutorials.com/install-motioneyeos-on-raspberry-pi-surveillance-camera-system/
Download MotionEyeOS at https://github.com/ccrisan/motioneyeos/releases

Once Successfully flashed you’ll need to track down the IP address of your Raspberry PI. I used Angry IP Scanner like the Tutorial suggested. NOTE: Please make sure you connect the raspberry Pi with Ethernet Cable for the first time!
Items Needed:
- Raspberry PI – pretty much any version would work
- MicroSD Card
- Ethernet Cord
- USB Camera or Raspberry Pi Camera

This is the USB Camera I bought
https://www.amazon.com/gp/product/B07GWP2SGV/ref=ppx_yo_dt_b_asin_title_o01_s00?ie=UTF8&psc=1
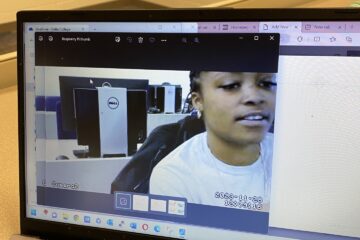
It was $7 and worth even less. Total Garbage can’t get it to focus at all. That image is of my dog and you can’t make her out even. About 6 foot away from the camera.
MotionEye is easy to use and has quite a few settings for file Storage, Network Connectivity, Motion Detection, and all the other features you would want for a security camera setup.

In Conclusion: the Raspberry Pi with MotionEye OS is very easy to setup and a great way to build a budge security camera setup. But take it from me, spend extra for a nicer camera or the whole thing is worthless!

0 Comments