Here’s Why I Created a PiVPN
The main reason I chose to do the PiVPN project was because I wanted to make my online activity more secure. Alternatively, I could’ve paid for a VPN service like Nord or Express VPN, but I felt like it’d be more practical to make my own VPN for further protection and to save money. It cost me around $200.00 to make a PiVPN which is roughly the same amount I’d pay if I used a VPN service at $6.00 a month for 3 years. Moreover, the protection I’d get from a VPN provider for 3 years is the same amount of protection I’d get indefinitely by creating the device myself. Not to mention the fact that Express or Nord VPN could be secretly stealing their clients’ online data. Ultimately, since cyber security continues to be a problem, I felt compelled to create a PiVPN to better protect my online privacy.
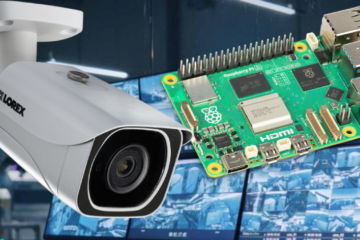
The PiVPN’s Physical Components
- Raspberry Pi 4 with 4GB of ram and 4 processors
- 128GB Samsung micro-SD card
- Silver Flirc Raspberry Pi 4 case
- USB type C power cable
- flash drive with an SD card slot
- ethernet cable
Links Used for Creating the PiVPN
- https://www.youtube.com/watch?v=Q4zlrc0F4NU
- https://www.youtube.com/watch?v=63yw7b0NuWc
- https://www.youtube.com/watch?v=0ptZPTTwRaE
- https://www.pivpn.io/
- https://www.raspberrypi.com/software/
- https://www.chiark.greenend.org.uk/~sgtatham/putty/latest.html
The Capabilities of a PiVPN
Essentially, what a PiVPN does is encrypt your internet traffic and replace your IP address with the PiVPN’s IP address. This is useful because it makes any online activity you do become anonymous making it difficult for third parties to track you. In addition, a PiVPN also enables you to access American content that’s geo-restricted in other countries. Moreover, any content that’s not geo-restricted in America but is geo-restricted in another country is something you’d have access to if you were in a country that’s restricting American content. This is of course assuming that your PiVPN was located in America.


My Last Thoughts and Recommendations
In the end, I really enjoyed this project. The challenge of building my own PiVPN has taught me a lot about how VPNs operate as well as how they can be used. However, there are some things I’d recommend people do differently than what I did if they ever wanted to take on this project. The main thing I’d do differently if I was doing this project all over again would be to not obtain the raspberry pi’s IP address through the use of a monitor and keyboard. The reason for this is because it’s harder and unnecessary. Moreover, I found out that you could obtain the raspberry pi’s IP address if you typed ping pivpn.local in your command prompt. Although, I want to add that your hostname which is the bit that’s right before the .local, may be different from mine. It all depends on how you set up your device. In addition, before typing your host_name.local into the command prompt, you should wait for the raspberry pi to be done rebooting, otherwise, your raspberry pi’s IP address won’t show up. In addition, I’d also encourage people to not buy a 128 GB micro-SD card because it’s unnecessary. The only reason I bought one was because I found a good deal on one and thought it’d help make the device faster, but it really had no effect.

0 Comments